The Main Window provides the primary user interface for the HiView application.
The appearance of the Main Window when HiView starts up depends on Preferences settings and its appearance the last time it was run, or if HiView is run for the first time or from the command line with a layout geometry restoration option. HiView will normally attempt to restore its appearance, including the last source location opened, when it starts up. During start up the built-in HiView "splash screen" image will always be displayed for a short time. If layout restoration is enabled the Activity Indicator will also be shown with its central disk colored yellow until the restoration occurs.
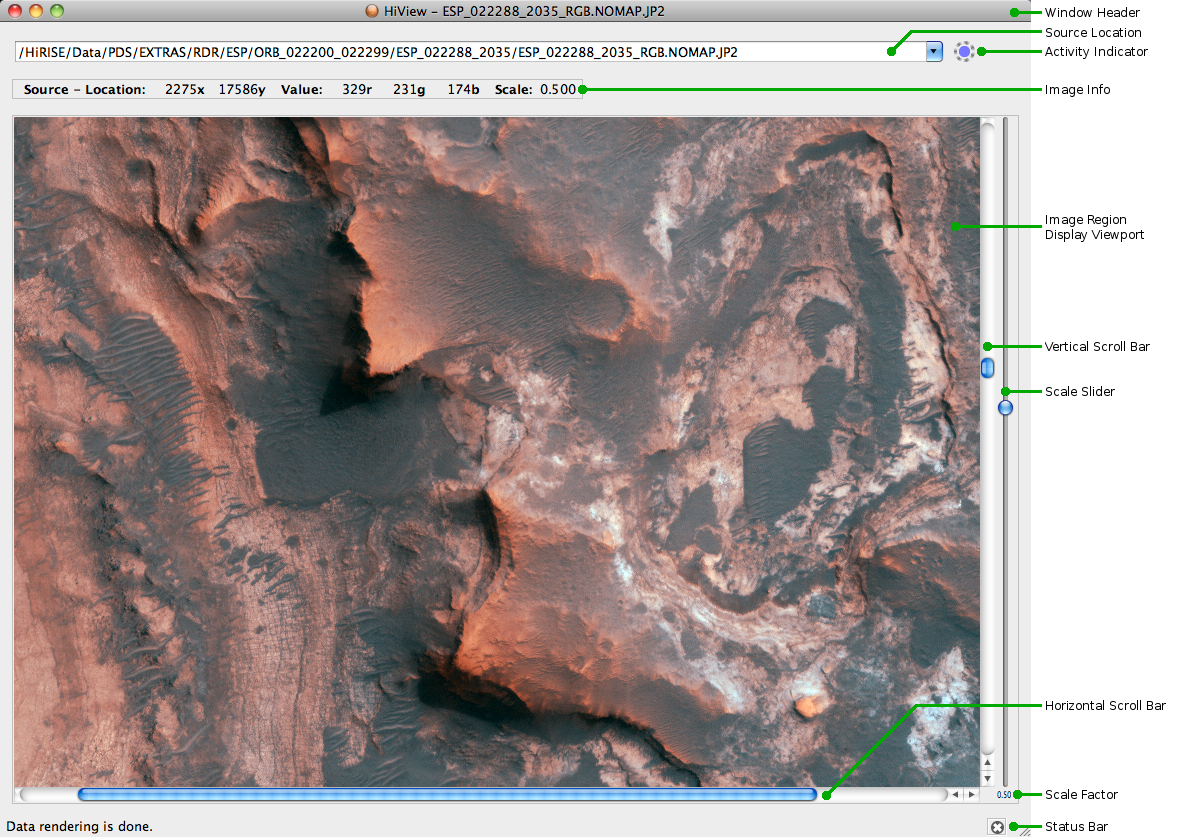
Above the Main Window will be a Window Header containing the application title (normally this will be "HiView" unless the application title has been changed by a command line option) followed by the name of the current source file. If only the HiView built-in "splash screen" has been displayed then no file name will be present. This occurs on start up when HiView does not restore the source being displayed the last time HiView was run on the system because Restore Last Source has been diabled in the Preferences or by a command line option, or HiView does not have a Preferences configuration file that contains any Source Location list (HiView is being run on the system for the first time or the configuration file has been removed or altered).
The Window Header is provided by the host system window manager, so its style may be different than the example provided here for a Mac system. Part of the Window Header style is the appearance of window controls. There are usually control icons in the Window Header for minimizing the window into a desktop icon representation (the keyboard shortcut is ⌘M on Mac or Ctrl+M on other systems), maximizing the window the fill the entire screen or returning it from maximized back to its previous size, and closing the window. When the Main Window is closed the application will Quit.
The Source Location field at the top of the Main Window specifies the location of a source image file. The content of the Source Location field is the source location last provided to HiView by any means, whether opening the source file succeeded or failed, or a source location that is in the process of being edited.
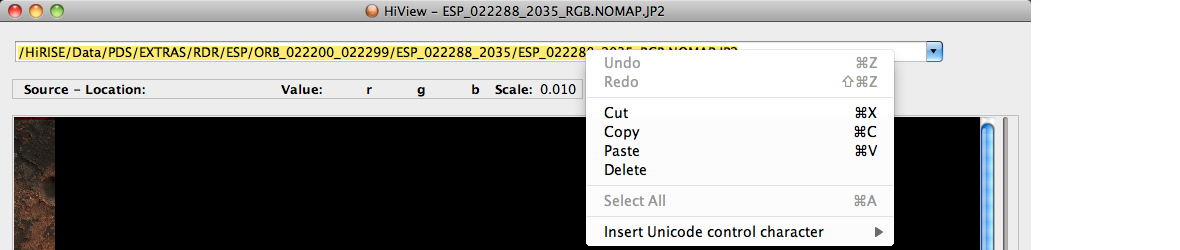
The content of the Source Location field may be edited using the text editing conventions of the host system. All or part of the text in the field may be selected and modified. A pop-up menu for the field provides items and keyboard shortcuts for the various editing operations.
In addition, when new text is being entered into an empty Source Location field, suggested text to complete the entry will be offered from the first entry in the Source Location List that matches what has been entered so far.

HiView maintains a list of opened source locations. Clicking the down arrow on the right end of the Source Location bar will drop down a scrolling list of source locations. The list entries are ordered by when they were last opened with the most recently opened location at the top; i.e. the most recently opened locations are listed first. Selecting an entry in the list will cause HiView to attempt to open the source location as if it had been entered in the Source Location field. If the location is opened the list entry is moved to the top of the list; if it can not be opened the entry is removed from the list. When a source location is opened that is not on the list the new location is added to the top of the list. If the list was filled to capacity when a new source location is opened the last entry in the list is removed to make way for the new entry.
The Source Location List capacity and its list entries can be changed using the Preferences Sources section.


Clicking the Activity Indicator will cancel the current image rendering operations. Leaving rendering incomplete may result in parts of the image display being adversely affected. However, if a remote JPIP server is being too slow to respond this may be appropriate, especially if the image tiles covering the Image Display Viewport have completed rendering. Rendering will be restarted as needed when the display settings are sufficiently changed.
The Display Viewport contains the region of the image that will fit in it at the current scrolling location and scaling factor. The Display Viewport occupies all the space of the Main Window not occupied by other components. Thus resizing the Main Window - by dragging the lower-right grab corner on Mac systems, or, on other systems, any corner or edge other than those for the Window Header - will resize the Display Viewport.
The Navigator Tool also uses a Display Viewport for its Overview Image. The description of the Display Viewport that follows applies to both.
Each display tile image is rendered - asynchronously in a background thread - from the source image data that corresponds to the tile's grid location relative to source image. Not all tiles in the grid have a tile image. Only those tiles that cover some portion of the image region to be displayed, plus a margin around these visible tiles, have a rendered image; this is the effective tile grid.
Because the tile grid is anchored to the source image origin and the tile size is a fixed display size, scrolling the image does not require re-rendering a tile image unless the Display Viewport is moved to a location that is no longer covered by a rendered tile image. The look-ahead margin tiles allow for nearby scrolling of the Display Viewport without any rendering once the margin tiles have been rendered. And when scrolling in a contiguous horizontal or vertical direction calls for additional tiles to be rendered, only the few tiles along the leading edge of the effective tile grid will need to be rendered. The Activity Indicator will appear when rendering is occurring.
Changing the image scaling factor requires re-rendering all tiles in the effective tile grid. This is because the content of each displayed tile will change. Thus image scaling is the most computationally expensive display operation and consequently the least responsive. For conventional image files this cost is mitigated by having the entire source image pixel data in memory so rendering tile images in this case is relatively quick. For JP2 files the source data may need to be re-rendered, which takes more time. However, JP2 files have the advantage that, instead of scaling a single set of pixels, the source image pixel data is produced from the JPEG2000 codestream at the available resolution level that will provide the best image fidelity; this will be full resolution for display scale factors of 1.0 or larger, or the closest resolution level that produces pixel data at or above the display scale factor otherwise. Thus, as long as the scaling factor does not cross a resolution level boundary - resolution levels are powers of two starting with full resolution at level 1, half resolution at level 2, quarter resolution at level 3, etc. - new source image data will not need to be rendered and re-rendering tile images for JP2 files will be as efficient as for conventional sources.
Scrolling, or panning, changes the location of the Display Viewport relative to the source image. This may be seen as moving the source image under the viewport, or moving the viewport over the source image, to control the region of the image that appears in the viewport. Either way, what changes is the displayed image Region Origin; i.e. the coordinate, in source image pixel units, of the pixel at the upper-left corner of the viewport. There are various ways to control the location of the image region in the viewport:
The size of the "thumb" in the scroll bar relative to the size of the entire scroll bar is generally proportional to the size of image region dimension relative to the size of the entire image dimension (though the thumb will not be allowed to become too small), so the thumb size will change with image scaling. The position of the thumb in the scroll bar is proportional to the position of the displayed image region in the entire image, so click and drag the thumb to change the image region location; moving the thumb will move the viewport in the same direction relative to the image. Clicking in the scroll bar, rather than on the thumb, will cause the thumb to move one "page" - i.e. the size of the display viewport - the is the direction of where the scroll bar was clicked. Pressing the Page Up or Page Down keys acts the same as clicking in the vertical scroll bar above or below the thumb, respectively. Clicking in the scroll bar while the Option key is held down (middle button click with three-button mouse) will cause the thumb to jump to be centered on the new position (or as close as possible) which will relocate the image region accordingly. Each scroll bar has small increment arrows at one end (or both ends depending on the window manager style) which, if clicked, will increment the location of the image region by one source image pixel (or one display pixel if the image is scaled down) in the corresponding direction.
Dragging the image region in the viewport while in Scroll Mode will scroll the image with the cursor position; the image under the cursor position will stay the same as the cursor is moved. The Scroll Bars will move as the cursor is moved, and the Navigator Image Region on the Overview Image, along with its appropriate Geometry values, will change accordingly.
While in Scroll Mode the arrow keys will increment the Region Origin in the corresponding direction as if the corresponding scroll bar arrows were clicked. If the Alt key is also being held down the Region Origin will be incremented by the page size (the size of the display viewport) as if the corresponding scroll bar was clicked.
Scaling, or "zooming", changes the apparent source image size being displayed in a fixed Display Viewport size. Image scaling is the ratio of a displayed image size, in display pixel units, to the size of the source, in source pixel units, that appears in the displayed pixels. Image resolution, in this context, can be thought of as this same ratio applied to a single pixel, when both display and source image pixels are square: i.e. the image resolution, or scaling, is the number of display image pixels, along one dimension, that correspond to a single source image pixel.
The image resolution, or scaling ratio can be expressed in various ways. HiView uses a floating point number scaling factor that is the display size divided by the source size. At a scale factor of 1.0 each display image pixel corresponds to a single source image pixel; at a scale factor of 4.0 a single source image pixel is represented by a display area 4 pixels across and 4 pixels high, with all of these pixels having the same value; at a scale factor of 0.1 a source image area 10 pixels across and 10 pixels high are represented by a single display pixel.
When a scaling factor does not result in a display image pixel that can represent a source image area with an exact number of pixels the fractional pixel dimension is accumulated along the display dimension and an additional display pixel is added whenever the accumulated amount exceeds one pixel. This distributes pixels evenly over the entire display dimension so that it will be as close as possible to the scaled source image dimension. HiView keeps track of these discrepancies between intended fractional pixel sizes and actual display pixel units when calculating source image locations from display image locations.
There are various ways to control the image scaling factor:
The image scaling factor is shown below the slider.
The Scale Image menu items are also available from a pop-up on the viewport. Action items selected via a pop-up menu are applied to the image being displayed in the viewport that is used.
Pressing the up or down arrow keys while in Scale Mode provides a very fine scaling increment, increasing or decreasing the scaling factor by the smallest possible amount that changes the resolution of the image in the Display Viewport.
HiView uses cursor shapes to signify when Scrolling and Scaling Modes are active and when certain control actions using the mouse have become enabled.
Reticule | 
|
|
The Reticule cursor points at the current image pixel that has its
location and value reported in the Image Info
panel and Navigator tool.
Fine
positioning of the pointing cursor is done using the arrow keys. Note
that the center of the cursor is transparent; the pixel being pointed at,
and its four surrounding pixels - above, below, left, and right - can be
seen as an aid when fine positioning is important.
| |
Scroll | 
|
|
The Scroll cursor is used when HiView is in
Scrolling Mode.
| |
Scale | 
|
|
The Scale cursor is used when HiView is in Scaling Mode.
| |
Shift Region | 
|
|
When the Statistics Tool is in use and a
measurement region as been selected on the display viewport this cursor
will appear when the region can be dragged to a new position without
changing the size of the selection.
| |
Resize Region |


|
|
When the Statistics Tool is in use and a
measurement region as been selected on the display viewport these cursors
will appear when an edge or corner of the region can be dragged to a new
location.
|
The Image Info Panel is shown immediately below the Source Location bar when the View menu Image Info item is checked. It displays the Location, in source image pixel coordinates, and Value of the pixel at the cursor position in the Display Viewport. These values will only be present when the cursor is positioned over the image region in Main Window viewport; the values are not present when the cursor is outside the image region in the viewport. The scale factor of the displayed image is always shown.
The Location and pixel Values will only be present when the cursor is positioned over the image region in the display; the values are not present when the cursor is outside the image region in the Image Display Viewport or outside the Image Display Viewport. The scale factor of the displayed image is always shown.
HiView provides a set of data exploration tools: the Navigator, Statistics, and Data Mapper tools. Each tool is dockable. The four sides of the Main Window will expand into a dock area whenever a tool is put in the dock for that area. The dock area will be expanded within the existing area of the Main Window. However if there is not enough space - the Display Viewport has a minimum size - then the Main Window will expand outward along the dock area side to provide the required space for the tool in the dock.
When a tool is first viewed it appears in its default dock area: the Navigator tool in the left dock, the Statistics tool in the bottom dock, and the Data Mapper in the left dock under the Navigator.
The size of dock areas within the Main Window can be changed, within the constraints imposed by the minimum size of the various components - by clicking and dragging the separator between the dock area and its adjacent component. The presence of the separator is indicated by the cursor changing to a double-headed arrow with a bar aligned with the separator. When more than one tool is located in the same dock area the relative sizes of the tools - again, within the constraints of minimum sizes - can be changed by clicking and dragging the separator between the tools. Resizing the Main Window may also change the size of dock areas, but only when the size of a dock area must change along with the window size; otherwise the Display Viewport size changes but not the size of the dock areas.
Docked tools can be moved to different dock areas. The Navigator can only be located in either the left or right dock; the other tools can be located in any dock area. When the Data Mapper or Statistics tools are located in a side dock their graph panels will not be shown, to make them more compact. All tools can also be floated out of the docks into their own separate windows. A floating tool window can be resized as desired. Floating tool windows will always be on top of the Main Window when they overlap. On Mac systems will disappear when HiView is not the active application and they will reappear when the HiView application is re-activated by clicking in the Main Window.
There are several ways to change a tool's location. At the right end of the tool's header bar are two small icon buttons. The button to the right with the 'X' in it will close the tool; when the tool is reopened it will be returned to location it was in when it was closed. The button to the left will float the tool out of the dock into its own window, or return it to its previous dock location if it is floating (on Mac systems this button is not present on floating windows). Dockable tools have a pop-up menu with items for relocating the tool. A tool can also be dragged, using its header bar, out of a dock area to be a floating window, and from a dock area or as a floating window into another dock area; as the cursor position dragging the tool header moves across a potential new dock area for the tool the dock area will expand into a blank region in which the tool can be dropped.
When the HiView application is Quit the location and size of all tools - including those that are in floating windows or currently not being viewed - are recorded along with the location and size of the Main Window in the HiView configuration file. If enabled in the General Preferences settings, or specified on the Command Line, the recorded application layout will restored the next time HiView is run; all tools previously being viewed will again be visible at their previous locations and sizes, and previously closed tools will be restored to their last locations and sizes when they are viewed again.
Dockable tools and layout restoration make HiView particularly suitable for use on large screen, dual-display systems where the Main Window is maximized to fill one entire display and the tools are appropriately arrayed on the other display. Each time HiView is started it will return to the layout that has been established.
The Status Bar displays information concerning the current state of the application. For example, the Status Bar may indicate when rendering is in progress, has been canceled, or is done; or that a source location could not be opened.
The Status Bar is initially not visible. Check the Status Bar item of the View Menu (or use its shortcut key combination) to make the Status Bar appear at the bottom of the Main Window. The Status Bar may be removed from the window (made invisible) by unchecking the Status Bar item in the View Menu, or clicking on the circled X button at the right end of the bar.